Axis Labels - Formatting for trading charts
If you develop some trading application, most likely, your chart will display some OHLC prices and indicators along with the corresponding date labels on X-Axis. In SciChart Axis Labels - LabelProvider API helps you to present these labels in the desired format. Quite a popular scenario in trading charts is when date labels formatting changes depending on the current zoom level, so the deeper zoom level is, the more detailed dates appear.
Note
Example of the Trading Charts Label Formatter usage can be found in the Multi-Pane Stock Chart example in the SciChart Android Examples Suite as well as on GitHub:
The most suitable type of X-Axis for trading charts is CategoryDateAxis. It uses TradeChartAxisLabelProvider to dynamically change its Text and Cursor Labels depending on Data-value and current zoom.
To format labels the TradeChartAxisLabelProvider class uses TradeChartAxisLabelFormatter<T> which incapsulates two formatters:
- CalendarUnitDateFormatter - for axis labels
- CursorCalendarUnitDateFormatter - for CursorModifier with axis labels.
Each of them formats dates depending on the current granularity using format(Date date, int calendarUnit) method. By default, there are few predefined formatters, so you will get dynamically changing axis labels out-of-the-box. In case, the default one doesn't meet your requirements, you can provide your own and customize your label provider. Please, continue reading to find out, how to do it.
Custom Trade Chart Label Provider
As an example of a Trade Chart Label Provider customization, let's create a custom one with some different formatters.
First, we need to subclass CalendarUnitDateFormatter and implement a protected method createFormatterForCalendarUnit(int calendarUnit) which will return a formatter with the desired date format depending on the current calendar unit. Here is, how it might look in code:
class CustomCalendarUnitDateFormatter extends CalendarUnitDateFormatter {
    @Override
    protected SynchronizedSimpleDataFormatWrapper createFormatterForCalendarUnit(int calendarUnit) {
        String dateFormat = "";

        if ((calendarUnit & CalendarUnit.YEAR) != 0) {
            dateFormat = dateFormat.concat(" yyyy");
        }
        if ((calendarUnit & CalendarUnit.MONTH) != 0) {
            dateFormat = dateFormat.concat(" MMM");
        }
        if ((calendarUnit & CalendarUnit.DAY) != 0) {
            dateFormat = dateFormat.concat(" dd");
        }

        final SynchronizedSimpleDataFormatWrapper formatter = SimpleDateFormatUtil.initWrapperFromFormatString(
                dateFormat,
                getLocale(),
                getTimeZone()
        );

        return formatter;
    }
}
Note
In case using createFormatterForCalendarUnit method to return your custom formatter doesn’t fit your needs and you want to have full control on formatting your axis labels, use format(Date date, int calendarUnit) method. Please, continue reading to see how you can use this method.
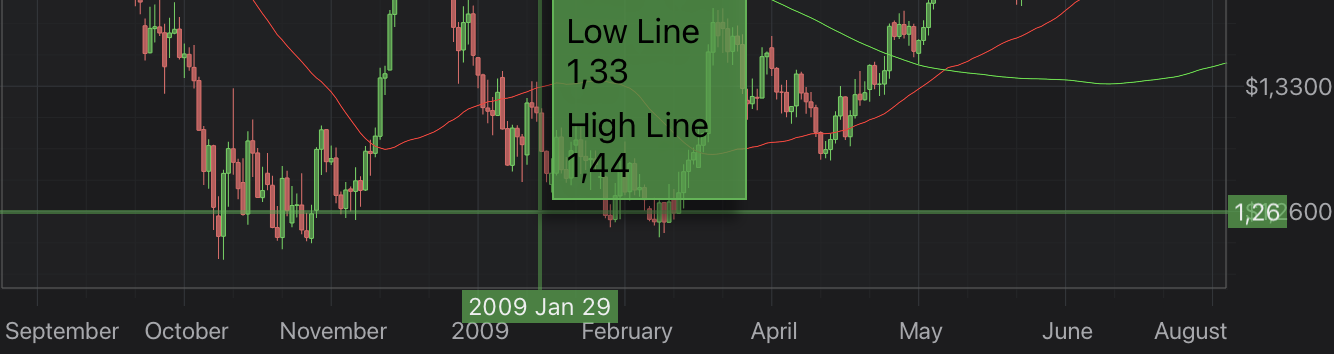
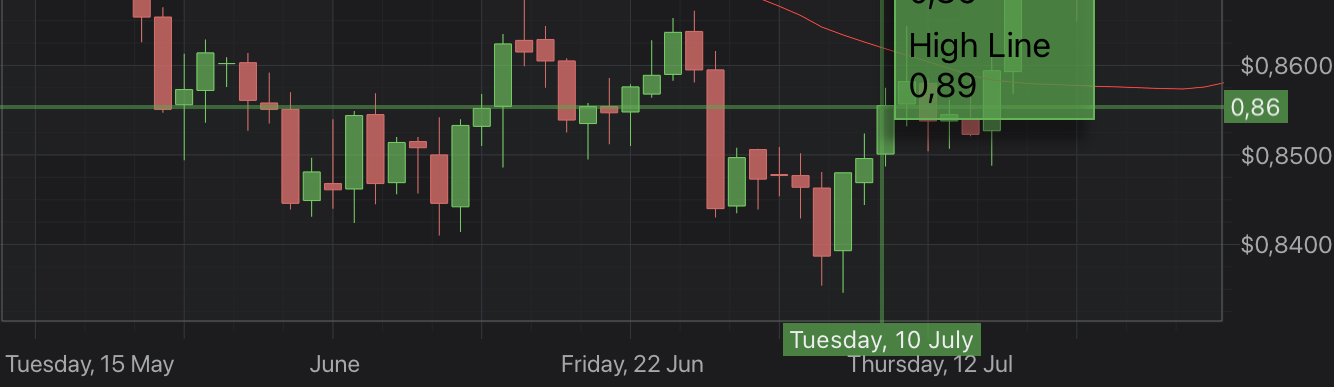
Let's also create some custom CursorModifier axis label formatter which will format cursor axis label depending on current granularity. So, for example, by default we want our Cursor to show a date in a format, like “2018 Jun 17” but when we zoom close enough - it should become something like “Monday, 10 June”.
Similar to how we create our CustomCalendarUnitDateFormatter, we will subclass CursorCalendarUnitDateFormatter and create two formatters with different date formats. Then, we will use format(Date date, int calendarUnit) method to return a string for our Cursor axis label. Here is how it will look in code:
class CustomCursorCalendarUnitDateFormatter extends CursorCalendarUnitDateFormatter {
    final SynchronizedSimpleDataFormatWrapper cursorDefaultFormatter = SimpleDateFormatUtil.initWrapperFromFormatString(
            "yyyy MMM dd",
            getLocale(),
            getTimeZone()
    );

    final SynchronizedSimpleDataFormatWrapper dayCursorFormatter = SimpleDateFormatUtil.initWrapperFromFormatString(
            "EEEE, dd MMMM",
            getLocale(),
            getTimeZone()
    );

    @Override
    public CharSequence format(Date date, int calendarUnit) {
        SynchronizedSimpleDataFormatWrapper formatter = calendarUnit < CalendarUnit.DAY ? cursorDefaultFormatter : dayCursorFormatter;

        return formatter.format(date);
    }
}
Next, we need to subclass TradeChartAxisLabelFormatter<T> and pass our custom formatters to its init, like this:
class CustomTradeChartLabelFormatter extends TradeChartAxisLabelFormatter {
    CustomTradeChartLabelFormatter() {
        super(new CustomCalendarUnitDateFormatter(), new CustomCursorCalendarUnitDateFormatter());
    }
}
Finally, create a TradeChartAxisLabelProvider subclass with our CustomTradeChartLabelFormatter and assign it to the labelProvider. Also, you need to add to your surface PinchZoomModifier to be able to zoom and CursorModifier to see the Cursor axis labels formatting in action. See the code below:
class CustomTradeChartLabelProvider extends TradeChartAxisLabelProvider {
    CustomTradeChartLabelProvider() {
        super(new CustomTradeChartLabelFormatter());
    }
}

CategoryDateAxis xAxis = new CategoryDateAxis(getContext());
xAxis.setLabelProvider(new CustomTradeChartLabelProvider());

PinchZoomModifier pinchZoomModifier = new PinchZoomModifier();
pinchZoomModifier.setDirection(Direction2D.XDirection);

CursorModifier cursorModifier = new CursorModifier();
cursorModifier.setReceiveHandledEvents(true);

Collections.addAll(surface.getChartModifiers(), pinchZoomModifier, cursorModifier);
Here are the results in the normal and slightly zoomed states:
In case such a customization doesn't fit your needs and you need some completely different Label Provider you can always create your own. You will find more details in Axis Labels - LabelProvider API article.