SciChart.js v6 in Alpha – WebGPU, Incredible Performance Gains and more
Our team has been working hard on continued R&D with SciChart.js – High Performance JavaScript Charts – and today we’d […]
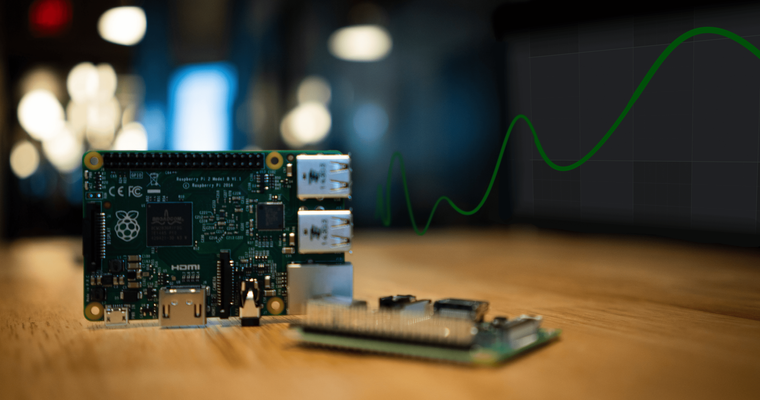
We once have received a question from a customer whether Android Chart Library from SciChart will work with the Raspberry Pi. To answer that we had a go and we have emulated a simple case and created a demo application where the room temperature is measured by a sensor and the data from the sensor is passed and visualized with SciChart Android, while it is all done on a Raspberry Pi, instead of the usual PC.
As you might guess reading this article it worked well😊 Please see more details further in the article.
What is Raspberry Pi
source: raspberrypi.org
“The Raspberry Pi is a low cost, credit-card sized computer that plugs into a computer monitor or TV, and uses a standard keyboard and mouse. It is a capable little device that enables people of all ages to explore computing, and to learn how to program in languages like Scratch and Python. It’s capable of doing everything you’d expect a desktop computer to do, from browsing the internet and playing high-definition video, to making spreadsheets, word-processing, and playing games.”
Taking one step back to see the bigger picture, Raspberry Pi is one of the most popular Single Board Computers that is used in IoT. Having a build in Lan Adapter and WiFi Adapter it can easily be connected to the Internet.
IoT stands for the Internet of Things while it is a big growing industry, its concept is pretty simple, it means taking all the devices in the world and connecting them to the internet.
IoT definition
source: Business Insider
“The Internet of Things, commonly abbreviated as IoT, refers to the connection of devices (other than typical fare such as computers and smartphones) to the Internet. Cars, kitchen appliances, and even heart monitors can all be connected through the IoT. And as the Internet of Things grows in the next few years, more devices will join that list.”
One of the common cases of having the Raspberry Pi used in IoT is build-in-panel for the smart house equipment that is connected to the Internet and allows its user to control the SmartHouse systems.
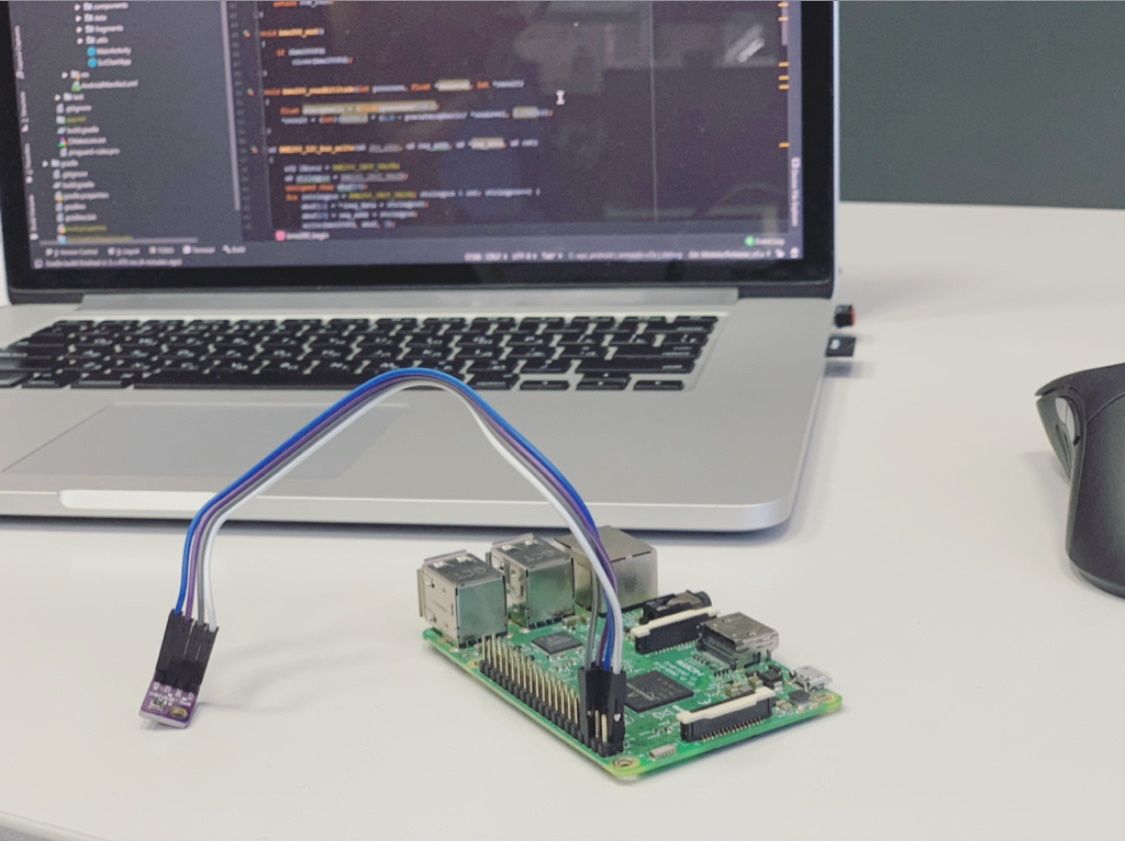
We have used the Raspberry Pi 3 Model B and the well known in IoT community BME280 sensor that measures the room temperature, pressure, humidity and more. For the ease of the model we will only work with the temperature. We will plot temperature data and visualize that in a realtime line chart on Android.
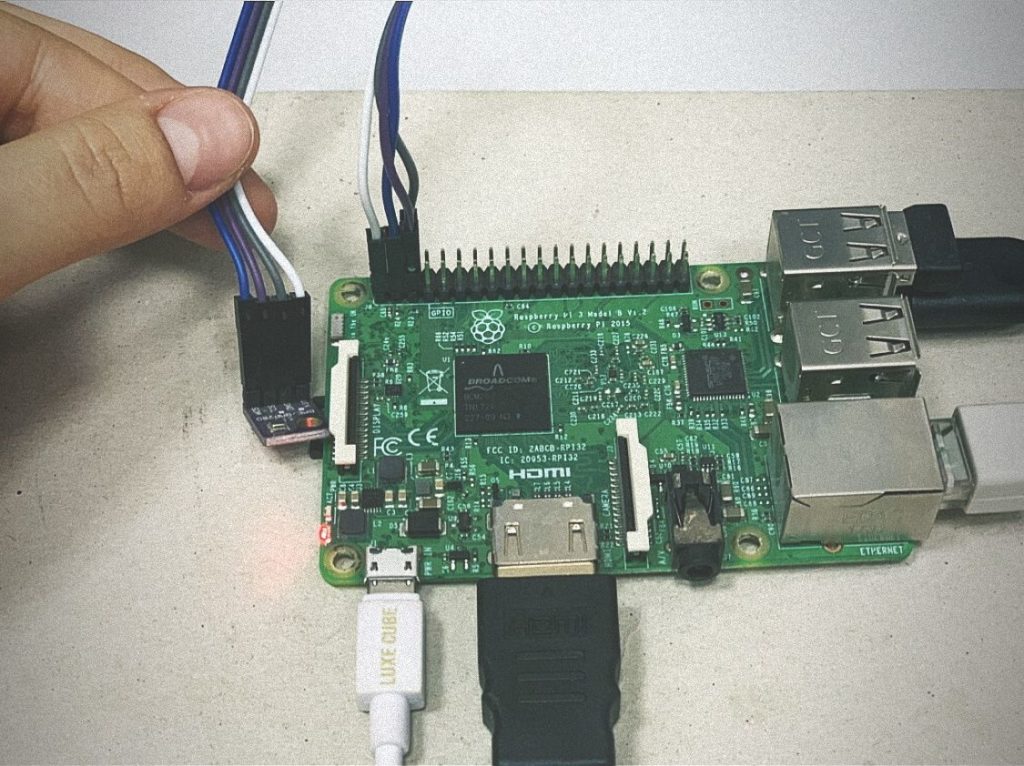
! Please note that even if you do not have the hardware you can still try out the code with the fake generated data. There is a special mode created to fall back to that data when no sensor is found!
We also have had two pairs of keyboards, one for Raspberry Pi and one for desktop computer, as well, as a monitor for the desktop.
We have used emteria OS, as at that moment Android Things were not released yet, we are pretty sure it will “just work” with the Android Things now. Other than that we have used these:
1. Android OS / emteria.OS port
2. Wiring Pi GPIO Interface library is used for establishing the communication between Raspberry Pi and a Temperature Sensor.
3. SciChart for Android library is used for temperature data visualization.
Let’s get to the coding part!
The code sample can be found on Github.
Where are the main parts can be found:
1. Wiring Pi library source code:
a. All the sources of the lib are added to folder appsrcmaincpp
b. The build configuration file CMakeLists.txt is added to app . This file contains a typical CMake configuration for assembling the library during a build. This file is included in the gradle file of the application as external native build.
2. All the project-specific functions that bind Java Runtime Environment with the native API of Wiring Pi are defined in the file: appsrcmaincppwiringPiwpi_android.c
3. SciChart fragment that is based on ExampleBaseFragment is defined in the file: appsrcmainjavacomscichartscichartonraspberryfragmentsFifoChartsFragment.java
For this let’s first let’s have a look at wpi_android.c file, this is where the data from the sensor is passed to Android. Later we will see where it is displayed with SciChart Android in simple realtime line chart.
Here we are establishing the communication between Raspberry Pi and a temperature sensor, the bme280. We include C header files of Wiring Pi and bme280 libraries.
#include <jni.h>
#include <wiringPi.h>
#include "bme280.h"
#include "bme280-i2c.h"
#include "si1132.h"

#ifdef __cplusplus
extern "C" {
#endif

#define LOGI(...)  __android_log_print(ANDROID_LOG_INFO,LOG_TAG,__VA_ARGS__)
#define LOG_TAG "wpi_android"

#define I2C_DEVICE  "/dev/i2c-1"
Then declare variables that are used to store physical quantities, the temperature, pressure and humidity. (To make it simple we are only going to show the temperature).
u32 pressure;
s32 temperature;
u32 humidity;

float SEALEVELPRESSURE_HPA = 1024.25;
Here we initialize a bme280 (sensor) device.
jint Java_com_scichart_scichartonraspberry_fragments_FifoChartsFragment_bme280_1begin(JNIEnv* env, jobject obj) {
    return bme280_begin(I2C_DEVICE);
}
This code shuts down a bme280 device when the whole application is off.
void Java_com_scichart_scichartonraspberry_fragments_FifoChartsFragment_bme280_end(JNIEnv* env, jobject obj) {
    bme280_end();
}
Next, we will be storing the data in variables, like actual physical quantities, the First in. Android will get the data from there; the place of the latest data stored and will only show it when the next data is ready to be stored, as the FiFo principle suggests.
void Java_com_scichart_scichartonraspberry_fragments_FifoChartsFragment_readyData(JNIEnv* env, jobject obj) {
    bme280_read_pressure_temperature_humidity(&pressure, &temperature, &humidity);
}
This next part of code gets a temperature value that is stored in the last update.
jint Java_com_scichart_scichartonraspberry_fragments_FifoChartsFragment_getTemperature(JNIEnv* env, jobject obj) {
    return temperature;
}
Gets a pressure value that is stored in the last update.
jint Java_com_scichart_scichartonraspberry_fragments_FifoChartsFragment_getPressure(JNIEnv* env, jobject obj) {
    return pressure;
}
Gets a humidity value that is stored in the last update.
jint Java_com_scichart_scichartonraspberry_fragments_FifoChartsFragment_getHumidity(JNIEnv* env, jobject obj) {
    return humidity;
}

#ifdef __cplusplus
}
#endifLet’s have a look at the description of a view code, the FiFoChartsFragment.java file. This is where we set the rules for our data First in First out by extending the fragment.
package com.scichart.scichartonraspberry.fragments;

import ...

import butterknife.BindView;


public class FifoChartsFragment extends ExampleBaseFragment {
Here is the bit that will be useful for those, who does not have a real device like a sensor and just want to see this working with the fake generated data. The fakeHardwareSensor variable is used for toggling test mode, where data is generated randomly rather than sampled from a real sensor.
    private static boolean fakeHardwareSensor = false;

    private final static String TAG = "scichart-wiringPi";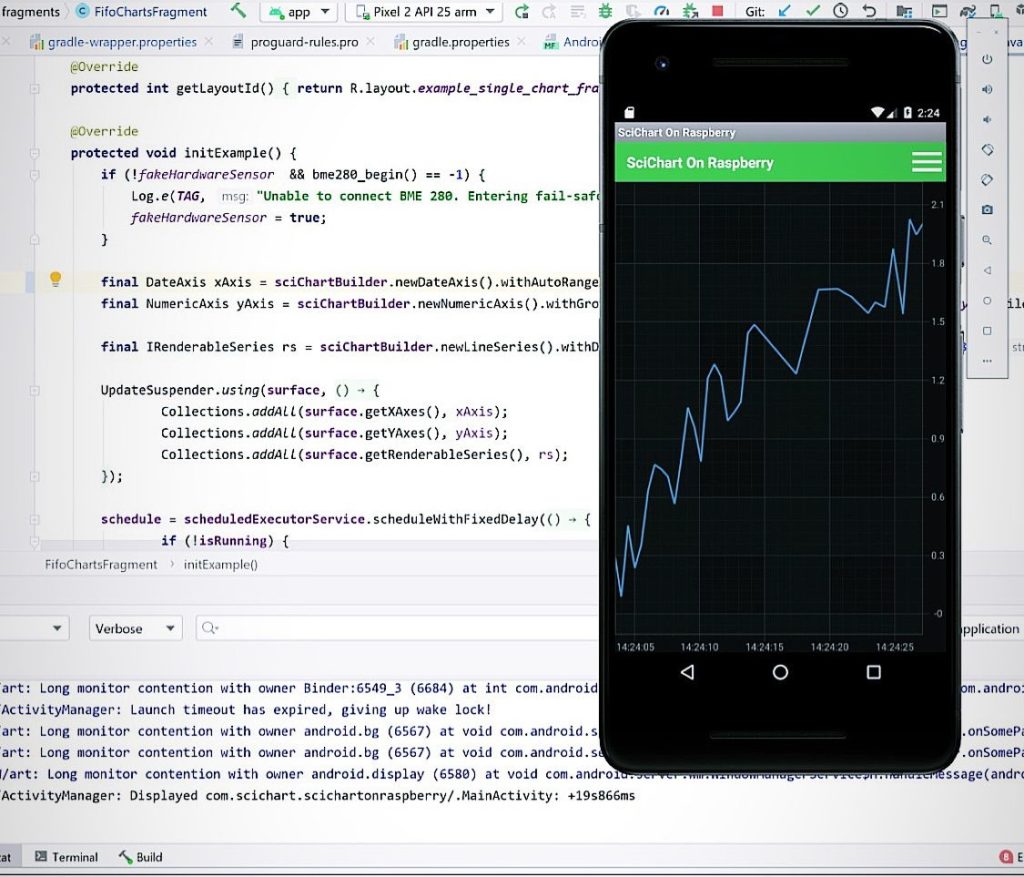
Here we define how our FiFo data will be shown on a screen: the capacity of FIFO buffer, update timer interval, visible range parameters, XY Data FIFO Series that would maintain latest values of temperature, SciChart Surface, etc.
    private final static int FIFO_CAPACITY = 500;
    private final static long TIME_INTERVAL = 500;
    private final static double ONE_OVER_TIME_INTERVAL = 1.0 / TIME_INTERVAL;
    private final static double VISIBLE_RANGE_MAX = FIFO_CAPACITY * ONE_OVER_TIME_INTERVAL;
    private final static double GROW_BY = VISIBLE_RANGE_MAX * 0.1;

    private Random random = new Random();


    private final IXyDataSeries<Date, Double> ds1 = sciChartBuilder.newXyDataSeries(Date.class, Double.class).withFifoCapacity(FIFO_CAPACITY).build();

    private final ScheduledExecutorService scheduledExecutorService = Executors.newSingleThreadScheduledExecutor();
    private ScheduledFuture<?> schedule;

    @BindView(R.id.chart)
    SciChartSurface surface;

    private volatile boolean isRunning = true;

    @Override
    public List<Widget> getToolbarItems() {
        return new ArrayList<Widget>() {
            {
                add(new ImageViewWidget.Builder().setId(R.drawable.example_toolbar_play).setListener(new View.OnClickListener() {
                    @Override
                    public void onClick(View v) {
                        isRunning = true;
                    }
                }).build());
                add(new ImageViewWidget.Builder().setId(R.drawable.example_toolbar_pause).setListener(new View.OnClickListener() {
                    @Override
                    public void onClick(View v) {
                        isRunning = false;
                    }
                }).build());
                add(new ImageViewWidget.Builder().setId(R.drawable.example_toolbar_stop).setListener(new View.OnClickListener() {
                    @Override
                    public void onClick(View v) {
                        isRunning = false;
                        resetChart();
                    }
                }).build());
            }
        };
    }

    @Override
    protected int getLayoutId() {
        return R.layout.example_single_chart_fragment;
    }

    @Override
protected void initExample() {We proceed working with out FiFoChartsFragment.java. Now we need to define the SciChart Surface. Doing this will add the surface on a background of the application view to our android application, as well as X and Y axes and series. In our case the series is one Line Series to create a line chart that will display the temperature and update it in realtime.
final DateAxis xAxis = sciChartBuilder.newDateAxis()/*.withVisibleRange(xVisibleRange)*/.withAutoRangeMode(AutoRange.Never).build();
        final NumericAxis yAxis = sciChartBuilder.newNumericAxis().withGrowBy(0.1d, 0.1d).withAutoRangeMode(AutoRange.Always).build();

        final IRenderableSeries rs = sciChartBuilder.newLineSeries().withDataSeries(ds1).withStrokeStyle(0xFF4083B7, 2f, true).build();

        UpdateSuspender.using(surface, new Runnable() {
            @Override
            public void run() {
                Collections.addAll(surface.getXAxes(), xAxis);
                Collections.addAll(surface.getYAxes(), yAxis);
                Collections.addAll(surface.getRenderableSeries(), rs);
            }
        });

        //
        /// Initialize the update timer
        //

        schedule = scheduledExecutorService.scheduleWithFixedDelay(new Runnable() {
            @Override
            public void run() {
                if (!isRunning) {
                    return;
                }
                UpdateSuspender.using(surface, insertRunnable);
            }
        }, 0, TIME_INTERVAL, TimeUnit.MILLISECONDS);
    }

    @Override
    public void onSaveInstanceState(Bundle outState) {
        super.onSaveInstanceState(outState);
        isRunning = false;

        outState.putDouble("time", t);
        outState.putParcelable("xValues1", ds1.getXValues());
        outState.putParcelable("yValues1", ds1.getYValues());
    }

    @Override
    public void onActivityCreated(Bundle savedInstanceState) {
        super.onActivityCreated(savedInstanceState);
        if (savedInstanceState != null) {
            t = savedInstanceState.getDouble("time");
            final ISciList<Date> xValues1 = savedInstanceState.getParcelable("xValues1");
            final ISciList<Double> yValues1 = savedInstanceState.getParcelable("yValues1");
            ds1.append(xValues1, yValues1);
        }
    }

    double t = 0;
    private final Runnable insertRunnable = new Runnable() {
        @Override
        public void run() {
            double y1;

            if (fakeHardwareSensor) {
                y1 = 3.0 * Math.sin(((2 * Math.PI) * 1.4) * t) + random.nextDouble() * 0.5;
            } else {
Reading data from sensor: this is where FIFO buffer is getting new Ys.
readyData();
                y1 = getTemperature() / 100.0;
                // getHumidity() / 1024.0;
                // getPressure() / 100.0;
                // getAltitude();
            }

            Date dateNow = new Date();
            ds1.append(dateNow, y1);

            t += ONE_OVER_TIME_INTERVAL;

//            if (t > VISIBLE_RANGE_MAX) {
//                xVisibleRange.setMinMax(xVisibleRange.getMin() + ONE_OVER_TIME_INTERVAL, xVisibleRange.getMax() + ONE_OVER_TIME_INTERVAL);
//            }
        }
    };
<- this bit scroll the chart
    @Override
    public void onDestroyView() {
        super.onDestroyView();

        if (schedule != null) {
            schedule.cancel(true);
        }

        if (!fakeHardwareSensor) {
Shutting down a sensor: this is to shut down the device and clear the FIFO buffer.
bme280_end();
        }
    }

    private void resetChart() {
        UpdateSuspender.using(surface, new Runnable() {
            @Override
            public void run() {
                ds1.clear();
            }
        });
    }
Defining signatures of native functions below.
public native int bme280_begin();
    public native void bme280_end();
    public native void readyData();
    public native int getTemperature();
    public native int getPressure();
    public native int getHumidity();
    public native int getAltitude();

    static {
        if (!fakeHardwareSensor) {
Loading native libraries.
            System.loadLibrary("wpi_android");
        }
    }
}
And that shall be it!
We have created a simple android application that gets the data about the room temperature from the sensor that is connected to the Raspberry Pi. It then sends the FiFo data from the sensor to our android application where it is visualized as a simple line chart. The line chart updates in realtime with the interval that we have defined and gives us the visual feedback that can be used for further analisys.
Hope you enjoyed the article, find it useful and learned something new.
Let us know if you have any questions!
Interesting Facts
Raspberry Pi has the Raspberry Pi Foundation established.
The Raspberry Pi Foundation is a registered educational charity (registration number 1129409) based in the UK. Their Foundation’s goal is to advance the education of adults and children, particularly in the field of computers, computer science and related subjects. See more.
SciChart has been undergoing the initiative to support students with free licenses for their university projects. You will read more about this in next articles, there are many great projects have been achieved to share about!
Also, to look at:
– Installing Android Things on Raspberry Pi –
https://developer.android.com/things/hardware/raspberrypi/
– Emteria OS –
https://emteria.com/
– Test out ScChart Android at
https://www.scichart.com/android-chart-features/
or download a demo to your phone
https://play.google.com/store/apps/details?id=com.scichart.examples
Recent Blogs
![]()
Queens Award for Innovation
Proud winners of the Queens Award for Innovation, 2019. Awarded on account of our innovative graphics engine which underpins the SciChart library and enables our world-beating charting performance
![]()
National Business Awards
Highly Commended for Lloyds National Business Awards, 2019. Awarded on account of our innovative graphics engine and impressive customer base
![]()
National Technology Awards
Awarded “Healthcare Tech of the Year” at the 2025 National Technology Awards – a top UK recognition for breakthrough innovation in technology.

Reviews
SciChart has received hundreds of verified, 3rd party reviews